Refer to the screenshot:
Administration / User Maintenance / User Defined Roles / User List
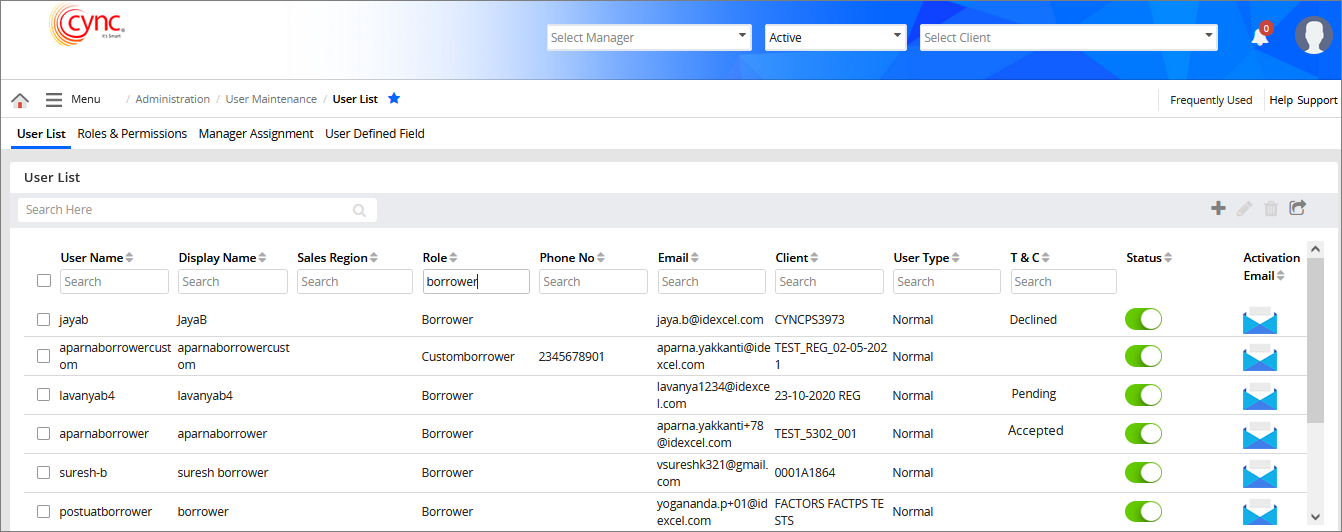
User List
The User List page shows a list of users. The list shows the username, user's display name, sales region, role, phone number, e-mail ID, re-send activation e-mail button, client name, and active/inactive status button.
Users can create, edit, and delete users from this list.
|
Table of Contents |
Navigation: Administration → User Maintenance → User Defined Roles → User List
Refer to the screenshot:
![]() If the Enabled option is selected in Terms & Conditions-User, the T & C column displays the T&C status on the User List page. In the User-Edit page and User-Add page, in the Terms & Conditions field, the 'Required' and 'Not Required' options are available in the drop-down list.
If the Enabled option is selected in Terms & Conditions-User, the T & C column displays the T&C status on the User List page. In the User-Edit page and User-Add page, in the Terms & Conditions field, the 'Required' and 'Not Required' options are available in the drop-down list.
Upon selecting the Terms & Conditions as 'Required', the Terms & Conditions: Date of Status field is updated for the Borrower and Participation Party role. If the Terms & Conditions field is selected as 'Required' for any user then that particular user will get the T&C pop-up once the user logs in to the CYNC application.
Based on the user action (Accept or Decline) the status will be updated on the User List page. If the user selects the option 'Not required' in the Terms & Conditions field then the T&C status will display as 'Not Required' in the User List page.
Refer to the screenshot:
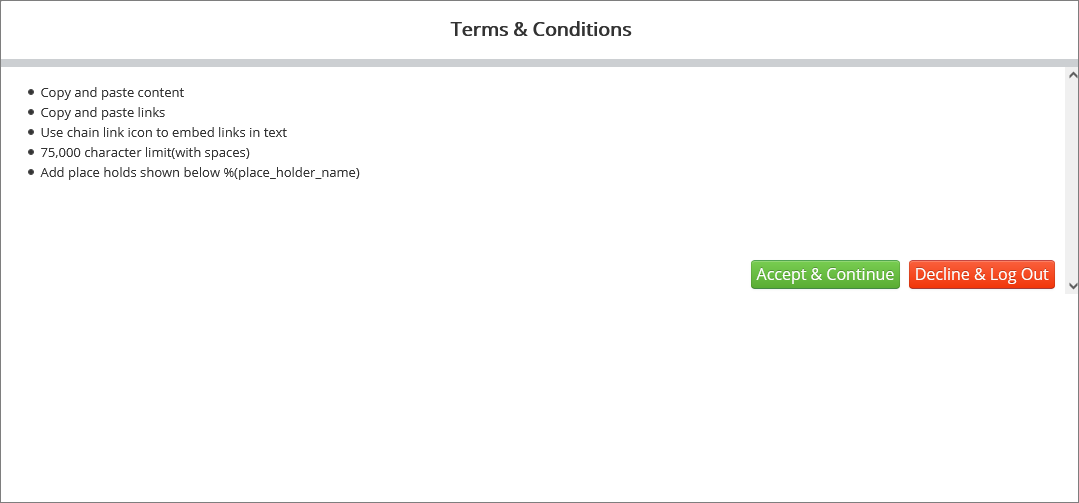
To accept or decline the Terms & Conditions, perform these steps:
1. In the Terms & Conditions pop-up, click  to accept the Terms & Conditions and continue using the application.
![]() In the User List page, the T & C is updated as 'Accepted'.
In the User List page, the T & C is updated as 'Accepted'.
2. In the Terms & Conditions pop-up, click  to decline the Terms & Conditions.
 In the User List page, the T & C is updated as 'Declined'.
To view and sort the user list, perform these steps:
1. Go to Administration → User Maintenance. The User Summary page appears. The list includes details of Normal and Emergency user types.
2. Enter the required keyword in search field under the columns.
3. Click on the fields below a column header. The user details appear.
4. Click the  button to go back to the User List page.
Note: A user is deactivated from the lender details page.
Refer to the screenshot:
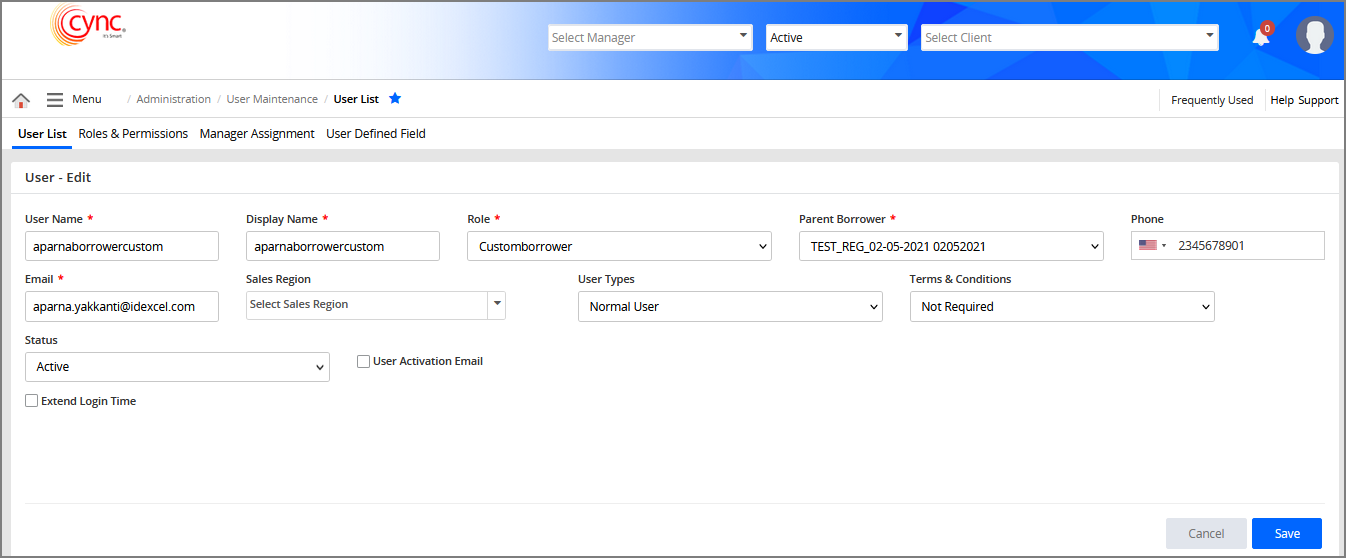
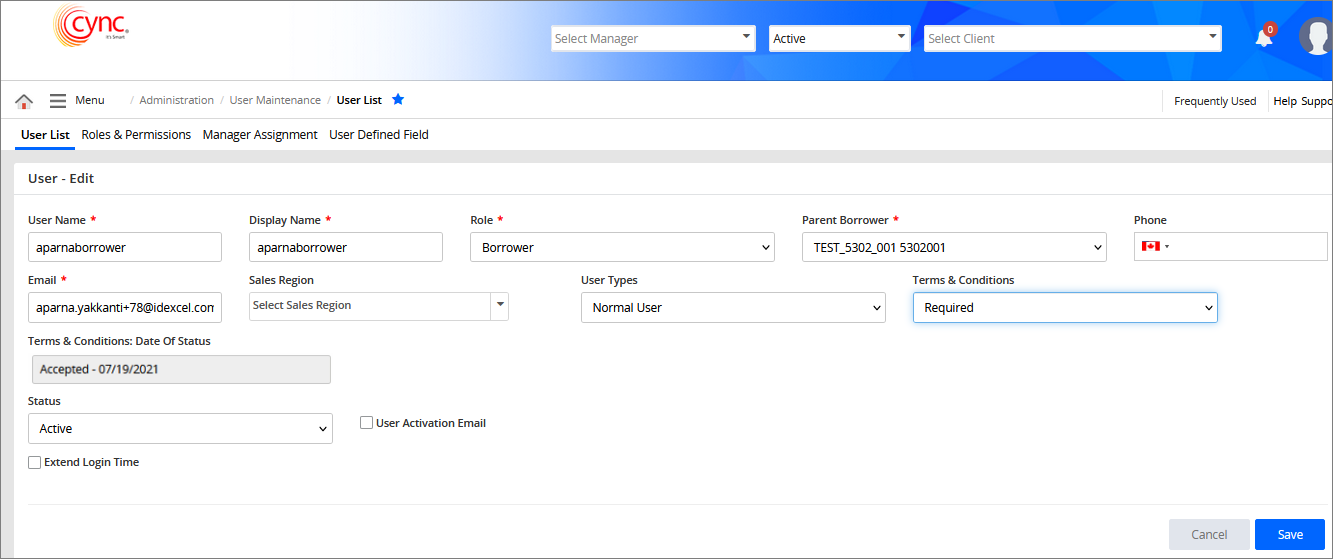
In the User-Edit page, by default, the Terms and Conditions field is selected as 'Not Required'.
To update fields for a user account, perform these steps:
1. Go to Administration → User Maintenance. The User List page appears.
2. Select the user and then click the ![]() button or click any record. The user edit page appears.
button or click any record. The user edit page appears.
3. Edit fields as required (non-mandatory fields).
For example, On the User-Edit page, if the Terms & Conditions is selected as 'Required', then the Terms & Conditions: Date of Status is updated as ‘Accepted-07/19/2021’.
4. Click the  button to update the user.
5. Click the  button to cancel the edit.
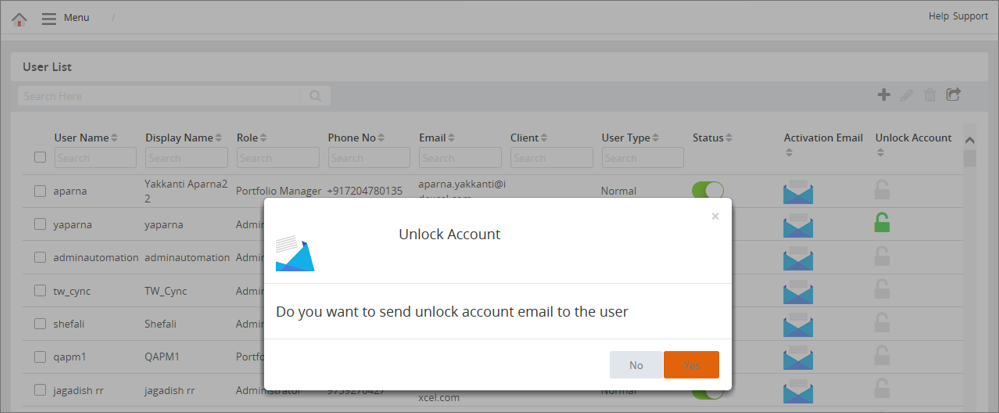
Refer to the screenshot:
The administrator may also send an unlock account email, when any user account is locked. Once the Administrator receives the email from the respective user, the administrator may send the Activation email link to the user from the Unlock Account option.
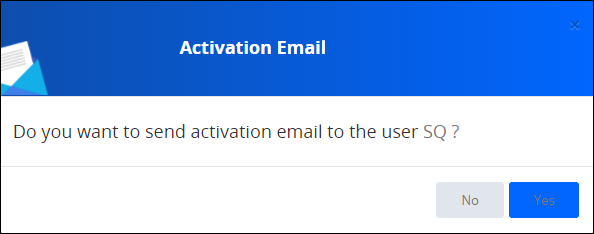
To send the activation e-mail link to the user, perform these steps;
Navigate to Menu → Administration → User Maintenance → User List.
1. Click the  button under the Unlock Account column. The unlock account confirmation pop-up appears.
2. Click Yes. The respective user with a valid email address receives an activation email with the link.
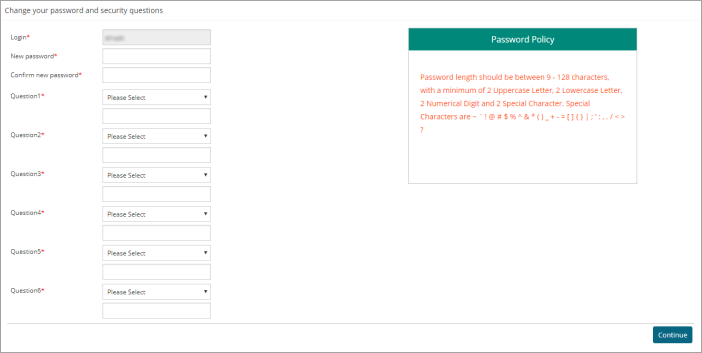
Refer to the screenshot:
The respective user can unlock the account and reset the password after receiving the activation email from the Administrator.
Click the Unlock Account link from the email to reset the password
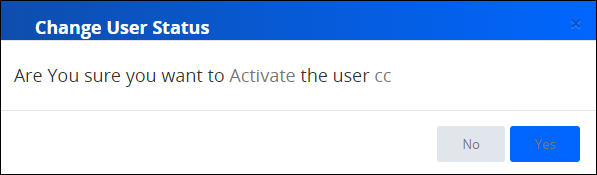
To deactivate a user, perform these steps:
1. Go to Administration → User Maintenance. The User List page appears.
2. Click the  check button for the user. A confirmation pop-up appears.
3. Click the  button to deactivate the user.
4. Click the ![]() button to cancel your action.
button to cancel your action.
Refer to the screenshot:
You can re-activate an inactive user by again clicking the button and then clicking the button in the confirmation pop-up.
Refer to the screenshot:
To delete a user, perform these steps:
1. Go to Administration → User Maintenance → User List. The User List page appears.
2. Select the user account that you wish to delete.
The system allows you to delete one or more or all user accounts.
3. Click the![]() button. A pop-up window appears.
button. A pop-up window appears.
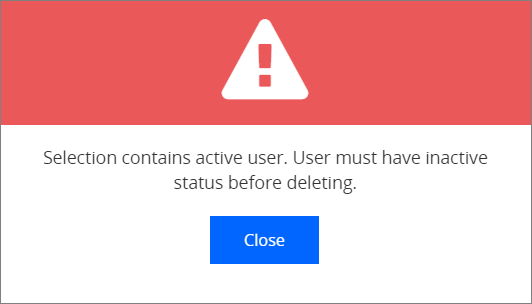
![]() You must deactivate the user account before deleting the user account.
You must deactivate the user account before deleting the user account.
If the selected user account is in active status, then the system shows a pop-up notification to make the user account inactive before deleting the user account.
Refer to the screenshot:
4. You can click the ![]() button and deactivate the user account and click the
button and deactivate the user account and click the  button. A pop-window appears.
Refer to the screenshot:
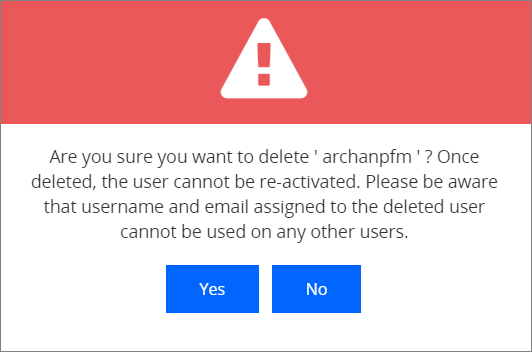
5. Click the  button to cancel the user account deletion process.
6. Click the  button. The user account is deleted successfully and a message “Record deleted successfully” appears.
7. Once the user account is deleted, the system logs the corresponding details in the Audit Logs page.